Mostrando entradas con la etiqueta cloud. Mostrar todas las entradas

viernes, 5 de marzo de 2021

Script to add an alert to an Azure App Service using Powershell

With this script, you can add an alert about the number of HTTP errors to an Azure App Service.

The same script could be used to add any kind of alert to any kind of Azure Resource.

---------------------------------------------------

lunes, 6 de abril de 2020

Create a Logic App to increase the number of instances in one App Service Plan


The purpose of this procedure is to increase the number instances of one WebApp in an automatic way, triggering from one specific http request. For that, one pre-requisite is to have Application Insights enabled for that WebApp.

First, we need to get the App Service Plan configuration in json format. To do that, we can do a REST API call to retrieve the json.

1. Generate the App Service Plan management URL:

     a. In the Azure portal, we navigate to the App Service Plan and copy the URL.


     b. Modify the URL as the example:

https://portal.azure.com/dafd**ail.onmicrosoft.com/resource/subscriptions/d9ec***a286c474d612/resourceGroups/ScaleOut_Test/providers/Microsoft.Web/serverFarms/ ASP-ScaleOut***/webHostingPlan

https://management.azure.com/subscriptions/ d9ec*****a286c474d612/resourceGroups/ScaleOut_Test/providers/Microsoft.Web/serverFarms/ASP-ScaleOut***?api-version=2019-08-01

2. We need to generate a bearer to authenticate. 

     a. An easy way is to use this site: 


     b. Click on TRY IT and authenticate with some credentials valid in the subscription, and you will get a temporary valid token.


3. Now we can use the App Service Plan management URL and the token to retrieve the json. We are going to use the tool Postman:


The next step is to get the information for the API Access of the Application Insights. We got this information in the Azure Portal. The information we need is the Application ID and one valid API Key.


To authenticate the REST API request we will launch to modify the App Service Plan, we are going to use an AAD APP, and we assign Owner permissions to this APP.


Now we can create the Logic App:
1. In the Azure Portal, go to the Logic Apps section and add a new Logic App.


2. The Logic App first trigger will be based in Recurrence:


3. Add and configure a new one step of type Application Insights - Run Analytics Query:


     a. Configure the Application Insights connection with the API Access information


     b. Configure the query we want to execute to see if the request has been registered in the WebApp:


4. Add and configure a new one step of type Control – For Each


     a. Add a Dynamic Content of “Value”:


     b. Add an action of type Control – Condition:


     c. Add a Dynamic Content of “Content_”


     d. And configure the condition as count is greater than or equal to 1


5. In the “If true”  column, add a new HTTP action:


     Configure the HTTP request as the example:


6. In the “If true”  column, add a new SMTP – Send Email (V3) action:


     a. Create an SMTP connection, with your SMTP server/user:


     b. Configure the outgoing email with the parameters you prefer, for example:


7. Finally, save the new Logic App


And if you want to verify if the change in the number of instances has been successful, check in the Web App, the sections Scale Out (App Service Plan) and Process Explorer:


martes, 18 de agosto de 2015

Importar máquina virtual a Azure

En este post vimos cómo crear una máquina virtual con Hyper-V, ahora vamos a subirla a Azure, el servicio Cloud de Microsoft.
Para ello, debemos contar con una subscripción, si no tenemos una, podemos hacer una de prueba en este link https://azure.microsoft.com/es-es/pricing/free-trial/

1. Una vez que tengamos nuestra subscripción, tenemos que instalar la consola de PowerShell de Azure, aquí se pueden encontrar las instrucciones para instalarla y conectarse a nuestra subscripción https://azure.microsoft.com/en-us/documentation/articles/powershell-install-configure/


2. Lo primero que tenemos que hacer es configurar el almacenamiento donde irá el disco duro de nuestra máquina virtual.
 New-AzureStorageAccount -StorageAccountName “teststorage1”  -label “test-storage1” -Location “West Europe” 


3. Para ver los datos de nuestro nuevo almacenamiento
Get-AzureStorageAccount


4. Por defecto, el Escritorio Remoto de nuestra máquina virtual en Hyper-V estará habilitado, pero no permitido a nivel de Firewall, por lo que es imprescindible hacerlo antes del siguiente paso. Hay que hacerlo tanto para redes públicas como para redes privadas.

5. Necesitamos convertir nuestro disco VHDX en VHD para poder subirlo a Azure
Convert-VHD -Path  “C:\Users\Public\Documents\Hyper-V\Virtual Hard Disks\w10_x86.vhdx” -DestinationPath c:\temp\w10x86.vhd   (la carpeta c:\temp tiene que estar creada anteriormente)


6. Ya podemos subir el disco duro de nuestra máquina virtual al almacenamiento de Azure.
Add-AzureVhd -Destination https://teststorage1.blob.core.windows.net/vhdstore/win10.vhd -LocalFilePath C:\temp\w10x86.vhd


7. Ahora nos vamos al portal de gestión de Azure https://manage.windowsazure.com y accedemos a la opción de Virtual Machines. Le damos a Create a Disk. 


8. Especificamos un nombre para el disco, le damos al icono de la carpeta para explorar el almacenamiento


9. Veremos el almacenamiento donde hemos subido el disco de la máquina virtual, lo seleccionamos y damos a Open.


10. Hay que marcar la casilla que indica que el disco duro virtual contiene un Sistema Operativo y seleccionar Windows 


11. Y ya tenemos el VHD preparado para nuestra máquina virtual.


12. En la parte de Instances, le damos a Create a Virtual Machine


13. Seleccionamos las opciones COMPUTE >> VIRTUAL MACHINE >> FROM GALLERY


14. En el asistente, en la parte inferior izquierda, seleccionamos MY DISKS y elegimos el VHD que hemos subido.


15. Le asignamos un nombre y unas características (estas dependen del precio que se quiera pagar). 


16. Creamos un nuevo servicio Cloud y le ponemos el nombre y los puertos por los que nos conectaremos a la máquina virtual por RDP y por PowerShell.


17. Indicamos si queremos algún software extra en nuestra VM…


18. Y esperamos mientras la VM se aprovisiona.


19. Cuando indique que la VM está Running, ya podremos conectarnos a ella a través de RDP.


20. Pulsamos sobre el icono CONNECT y el navegador nos pedirá si queremos abrir o guardar el archivo con extensión .rdp.


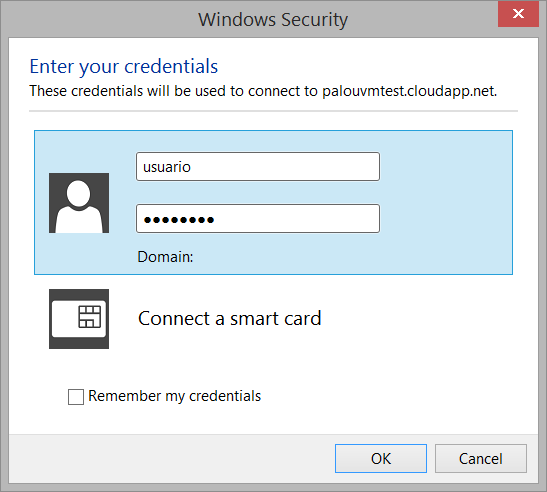
21. Cuando abramos dicho archivo, iniciará la conexión de Terminal Server y nos pedirá el usuario y contraseña de la máquina virtual (recordad que en este caso es el que configuramos cuando creamos la máquina virtual en Hyper-V)


22. Nos saldrá la alerta de seguridad correspondiente al certificado de la máquina, ya que es autofirmado, aceptamos…


23. Y estaremos conectados a nuestra máquina Windows 10 en Azure.